Phone:
+60 11-2406 0933
Physical address:
No. 40-1, Jalan PUJ 3/2, Taman Puncak Jalil, Bandar Putra Permai, Seri Kembangan, Malaysia
Are you tired of your old kitchen cabinets? Want a fresh, modern look? This guide shows you how to update your cabinets easily and affordably. You can change the style, protect them, or just refresh the look. We’ll cover painting, adhesive paper, vinyl wraps, and wood veneers1.
Want to change your kitchen’s look without a big renovation2? Try cabinet refacing or resurfacing. This easy way updates your kitchen cabinets’ style. It works with overlay, inset, or 3/8-inch lip doors2.
Covering your cabinets brings many benefits. It refreshes your kitchen’s look and protects cabinets from damage. This means you don’t need a full kitchen redo3. You can choose from wood stains or modern colors like blue, green, or grey. This makes your kitchen look new without spending a lot3.
There are several ways to cover kitchen cabinets. You can paint, use adhesive paper or vinyl wraps, or install wood veneers2. Each method suits different budgets and tastes. This lets you pick the best way for your kitchen makeover2.
Choosing to cover your cabinets can change your kitchen for the better. It’s an affordable way to update your space without a full kitchen redo3.
“Covering your kitchen cabinets is an easy and affordable way to give your space a fresh new look without the hassle of a full renovation.”
Before you start covering your kitchen cabinets, check their condition and material. Knowing what they’re made of and how they look will help you pick the best covering5.
Kitchen cabinets are often made of wood, laminate, metal, or thermofoil/melamine. Knowing what yours are made of helps you choose the right covering6. Wood cabinets look warm and classic, and they last a long time6. MDF cabinets are great for painting and are budget-friendly6. Plywood is strong and good for kitchens6. Laminate is easy to clean but not as durable as wood or plywood6.
Check your kitchen cabinets carefully to see what they need. Look for scratches, dents, or peeling finishes. Make sure they’re sturdy and don’t wobble. This will tell you if you need minor fixes or a big change before covering5.
Getting the surface ready is key for a good cabinet covering. Clean the cabinets well to remove grease and dirt that could stop the covering from sticking7. Then, sand or buff the cabinets to make a smooth surface for the covering7. This makes your cabinet change last longer7.
Understanding your cabinet material, checking their condition, and preparing the surface well will help you get great results576.
Refreshing your kitchen cabinets has many options. You can choose from paint, adhesive paper and vinyl wraps, or wood veneers. Each has its own benefits to change your kitchen’s look8. Let’s look at the good and bad of each to help you pick the right one for your kitchen.
Paint is a budget-friendly way to update your kitchen. It lets you pick the color and finish you like. It works well on wood, laminate, or metal cabinets, hiding small flaws8. For a good paint job, prep the surface well and use quality cabinet paint.
Adhesive paper and vinyl wraps are fast and easy for a new look. They come in many patterns and colors, fitting your style. They’re great for laminate or thermofoil cabinets, offering a clean surface8. Putting them on is simple, making it a good choice for DIY lovers.
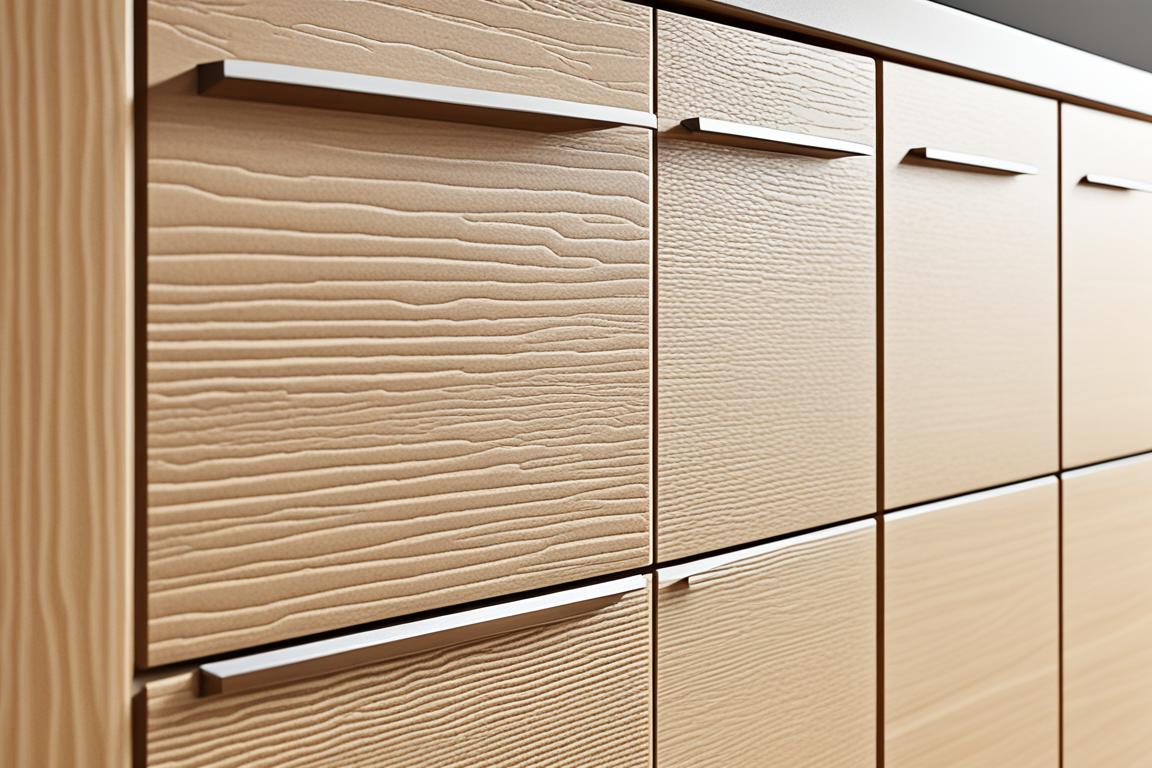
Wood veneers give a classic wood look to your cabinets89. They’re thin sheets of real wood that add beauty and warmth. You can choose from many species and finishes for a unique, upscale look. With the right care, veneers last a long time.
Before picking a covering, check your cabinets’ condition and prep them well. This makes sure your new look lasts and looks great8910.

“Investing in quality materials and proper preparation can make all the difference in the longevity and appearance of your covered kitchen cabinets.”
Getting ready is key for a great cabinet covering job. First, collect the tools for cabinet covering you need. Also, set up a good workspace preparation for cabinet covering. This makes the job go smoothly and avoids problems later.
What tools and materials you need depends on how you cover your cabinets. For painting, you’ll need paint brushes, roller trays, and top-notch primer and paint11. If you’re using adhesive paper or vinyl wraps, you’ll need a utility knife, measuring tape, and the right adhesive or wrap12. For wood veneers, you might need a veneer trimmer, adhesive, and a roller or squeegee to apply the veneers.
You’ll also need safety gear like gloves, goggles, and a mask to stay safe during the project13.
Having a clean and organized workspace is key for a good cabinet covering job11. Begin by cleaning the cabinet surfaces well, getting rid of dirt, grease, or anything that could affect the covering’s stickiness13. Then, cover your floors, walls, and other surfaces with plastic sheeting or paper11. This keeps any overspray or dust in check, making your workspace neat and safe.
Make sure your workspace is well-ventilated for the covering materials to dry and cure properly13. Taking the time to prepare your workspace well sets you up for a smooth cabinet covering project.

“The process of taping and draping was described as time-consuming but deemed essential for the project.”11
Changing the look of your kitchen cabinets is easy with the right steps. You can cover them with paint, adhesive paper and vinyl wraps, or wood veneers. This guide will show you how to do it step-by-step.
Painting your cabinets is a great way to save money. First, clean and degrease the surfaces for better paint adhesion. Think about adding a 1-inch wooden ball knob to your cabinet doors.14 Then, prime the surfaces and paint them with your chosen color. For a pro look, use a paint sprayer or quality brush and roller.
Adhesive paper and vinyl wraps make updating cabinets simple. Measure your doors and drawers first. Choose from clear, frosted, seeded, or ribbed glass for your cabinet doors.14 Clean the surfaces well, apply the wrap, and smooth out bubbles with a squeegee or roller.
Wood veneers add a natural elegance to your cabinets. Measure your doors and drawers before picking veneer sizes and types. Use edge banding in various sizes and woods for custom doors.14 Apply the veneer carefully for a pro finish.
Choosing any method, prep well and pay attention to details for great results. With creativity and effort, you can change your kitchen cabinets. This will make your space show off your style.

“Covering kitchen cabinets can be a game-changer, allowing you to update the look and feel of your entire kitchen without a complete overhaul.”
Painting your kitchen cabinets is a great way to update your kitchen without spending a lot of money15. It’s cheaper than replacing them, costing only a few hundred dollars15. A well-done paint job can also increase your home’s value15.
Choosing the right paint is key for a good cabinet paint job15. Oil-based enamel paint works well for its smooth finish and stain resistance1516. Benjamin Moore’s Advance is a good choice for cabinets because it dries hard and is good for busy kitchens16.
17 Satin, semi-gloss, or gloss paints are best for kitchen cabinets. They’re easy to clean, resist grease, and don’t chip or scratch easily17. You can choose from many colors and finishes for a unique look17.
“Painting over existing paint on kitchen cabinets can potentially lead to future problems such as peeling, an uneven finish, or alignment issues due to the buildup of multiple layers.”15
Remember, painting over old cabinet colors can be tricky. It might affect the new color and cause texture or adhesion problems15.

By following these steps and picking the right paint, you can give your kitchen cabinets a new look that will last151617.
Adhesive paper and vinyl wraps are great for a quick kitchen cabinet update. They give a smooth look that can last up to 10 years18. They’re perfect for renters or anyone wanting a new look without spending a lot.
Applying these coverings needs some steps. First, clean the cabinets well for a smooth wrap18. Then, measure and cut the material to fit each door and drawer, leaving extra for wrapping18.
There are two types of vinyl wraps: adhesive-backed and heat-activated. Adhesive-backed wraps are easy to apply18. Heat-activated wraps need a hair dryer to stick well18.
After putting on the wrap, smooth out any bubbles for a neat look. Then, put back any handles and doors for a full change18.
Don’t paint over vinyl wraps as they might peel off together with the paint18. Keep the wrap looking good by following the care instructions.
These coverings come in many designs, from solid colors to patterns and textures19. You can get a modern or traditional look with these DIY options19.
Vinyl wraps cost between £8 and £30 per 2-meter roll, with luxury ones costing more20. The total price depends on your kitchen size and material quality20. These DIY solutions are cheaper than professional services, which can be £150 to £600 or more20.
With careful application, adhesive paper or vinyl wraps can refresh your kitchen. They’re great for homeowners or renters wanting a new look without spending a lot19.
Wood veneers are a great choice for a classy look on kitchen cabinets21. They’re a budget-friendly way to give your kitchen a high-end feel without replacing everything21.
To apply wood veneers, you need to follow a step-by-step guide21. You’ll need tools like drills, sandpaper, edge banding, and veneer sheets21.
Wood veneers look great and last a long time on kitchen cabinets21. They come in many types, from wood to vinyl, to match your style21. With the right prep and application, they can make your kitchen look high-end and custom23.
“The tutorial provides a detailed step-by-step process for applying wood veneer to kitchen cabinets, indicating a growing interest in DIY projects and an increased demand for detailed instructional content within the interior design and home improvement market segments.”21
| Veneer Type | Recommended Adhesive | Best Practices |
|---|---|---|
| Raw Wood Veneer | Solvent-based Contact Cement | Degreasing and roughing up the surface with 80-grit sandpaper before application |
| Curved Surfaces | UF, PVAs, or Contact Adhesives | Use a male/female jig to minimize movement during the process |
| Wood Veneer Edging | Wood Glue or ‘Cold Press’ Veneer Glue | Start with the longest edges first to ensure efficient use of materials |
By using the right techniques and tools, you can get a beautiful veneer finish for your cabinets23. This tutorial will help you give your kitchen a classy, custom look212223.
Keeping your covered kitchen cabinets in top shape is key for their long life and good looks24. Taking good care of them means they can last a long time and keep you happy24.
For painted, covered, and wood cabinets, cleaning them often is a must25. Clean your cabinets at least every two weeks, or more if your kitchen gets a lot of use24. But, don’t use strong cleaners like bleach or ammonia because they can harm the finish24. Instead, use gentle cleaners like warm water with vinegar or mild dish soap25.
Sunlight can fade your cabinets, especially if they’re made of natural wood24. To keep them looking great, keep your kitchen’s humidity between 35% and 50%24. Also, fix any leaks or spills near the sink and dishwasher quickly to avoid damage26.
For laminate cabinets, just use warm water and mild dish soap for cleaning26. Tough stains can be cleaned with baking soda paste or diluted bleach25. Also, reapply mineral or vegetable oil on maple chopping blocks or other wood parts now and then25.
Wood can swell, shrink, and warp from big changes in temperature and humidity24. Keep your cabinets in a stable place to avoid this. Also, put felt or cloth under plastic or rubber items to stop them from damaging the wood24.
By following these tips, your covered kitchen cabinets will stay looking great for a long time. Taking care of covered cabinets, caring for covered cabinets, and using the right cleaners will help them last longer and look better242625.,,
There are many ways to make your kitchen cabinets stand out. You can add decorative trim and molding or use open shelving with glass inserts. These ideas can make your kitchen show off your style27.
Try using earthy tones for your cabinets27. This makes your kitchen feel warm and welcoming. You can also use different colors for the lower and upper cabinets for a cool effect27.
For a classic look, go with rich, dark colors like walnut27. High-gloss paint can also make your kitchen look bigger by reflecting light27. Mixing cabinet colors can add fun and brightness27.
Vented cabinets add a unique touch, especially if you have laundry in your kitchen27. Using native materials for your cabinets shows respect for the environment and adds a special touch27.
Pastel cabinets bring warmth and color to your kitchen27. Stained glass panels and dark wood give your kitchen an elegant look27.
For a modern feel, try fluted or slab-front cabinets with clean lines28. Beveled frames can add a retro and modern touch28.
Open shelving makes things easy to reach and shows off your favorite items28. Shaker-style cabinets are a classic choice that works well in any kitchen28.
The key to customizing your cabinets is to show off your style29. You can choose bold colors, unique textures, or a mix of old and new. The possibilities are endless272829.
With these ideas, you can make your kitchen reflect your unique style and personality272829.
| Customization Idea | Percentage of Examples |
|---|---|
| Using earthy tones for kitchen cabinets | 40%27 |
| Splitting lower and upper cabinets with different hues | 20%27 |
| Adding vented cabinets for homes with laundry in kitchen | 10%27 |
| Using rich, dark colors like walnut for a timeless aesthetic | 5%27 |
| Choosing high-gloss paint to reflect light and make space appear larger | 5%27 |
| Mixing cabinet colors creatively to add brightness and whimsy | 5%27 |
| Choosing native materials for cabinetry to honor the environment | 5%27 |
| Incorporating pastel-colored cabinets to add warmth and color | 5%27 |
| Using stained glass panels and dark stained wood for an elegant, timeless look | 5%27 |
These ideas can help you make your kitchen cabinets unique and personal. Whether you like bold colors, unique textures, or a mix of styles, there are many options272829.
“The kitchen is the heart of the home, and your cabinets are the soul of the kitchen. Customizing them can truly bring your culinary haven to life.”
So, get creative and let your kitchen cabinets show off your style. With the right ideas, you can make your kitchen both beautiful and tailored to your taste272829.
Kitchen Cabinet IdeasKitchen Cabinet IdeasKitchen Cabinet Design
This guide showed you how to change your kitchen cabinets on a budget. You can paint them, use fun stickers, or add wood veneers. The options for kitchen cabinet transformation30 are endless.
Now, you know how to make your kitchen look new. You can clean your cabinets well30 and add new storage and lights31. This makes DIY cabinet updates easy.
Starting your kitchen cabinet project is exciting. It’s about making a space that shows your style and works better for you. With the right materials and this article’s advice, you’re ready to improve your kitchen. Enjoy the process and see your kitchen become more beautiful and organized. Your dream kitchen is close!
Covering kitchen cabinets can make them look new again. It also protects them from damage and can make them last longer. This is a smart way to update your kitchen without a big expense.
The top ways to cover cabinets are painting, using sticky paper and vinyl wraps, and adding wood veneers. Each method suits different tastes and skills.
To figure out what your cabinets are made of, check their condition and look for common materials like wood, laminate, metal, or thermofoil/melamine. A close look at the surface will help you pick the best covering method.
Paint lets you change the look easily and fully. Adhesive paper and vinyl wraps work fast and make a big change. Wood veneers add a classy and lasting beauty. Each material has its own look and benefits.
For covering cabinets, you’ll need different tools and materials based on the method you choose. This includes paints, adhesives, safety gear, and a clean workspace. These help make the project go smoothly.
Keeping your covered cabinets looking good is key. Use the right cleaners and methods for the covering material. Also, fix any small damage as it happens to keep them looking great.
To make your cabinets your own, try adding trim, molding, or new hardware. You can also use open shelving or glass inserts. Adding unique textures or patterns can make your kitchen stand out with your style.
